The Building Blocks of Azure Data Factory

Getting started with Azure Data Factory
A plethora of tools exist to create data pipelines. Every major player in the cloud computing business provides one (Azure Data Factory, AWS Glue, Google Cloud Composer, Databricks Workflows), though various open-source alternatives exist as well (e.g., Airflow, Airbyte, or Prefect. Though they’re open source, fully managed versions of these do exist (e.g., Astronomer provides a managed version of Airflow called Astro). Previously, I’ve had enjoyable experiences building pipelines with Airflow (self-hosted), Databricks Workflows, and Delta Live Tables (though not really an orchestrator).
Recently, I’ve had to create pipelines in Azure Data Factory (ADF), which I knew very little about. During my initial research I tried creating a very simple pipeline myself. In the process, I came across several key concepts. Let’s go over each of these components, what they’re used for, and how you can combine them to create your first pipeline in ADF. But first, what is ADF?
Please note that this is not meant as a complete walkthrough to build your own pipeline. Rather, it is meant as an overview of the basic components that go into building pipelines.
Data Factory
Azure Data Factory (ADF) is a cloud-based data integration service. It is more than just a scheduler, as it enables users to create, schedule, and manage data pipelines. Within Azure, ADF is the de-facto tool for data movement across various Azure services, such as SQL Databases or Blob Storage. It has an intuitive interface with drag-and-drop elements.
One of the things I like the most about ADF is that while it’s mostly used through a graphical user interface (GUI), ADF allows for easy git integration. This allows you to quickly test a few things in a development environment, and then push these changes to a git repository without having to define the code yourself. From there, you can use the autogenerated code definition of your ADF to deploy to other environments, such as a production environment.
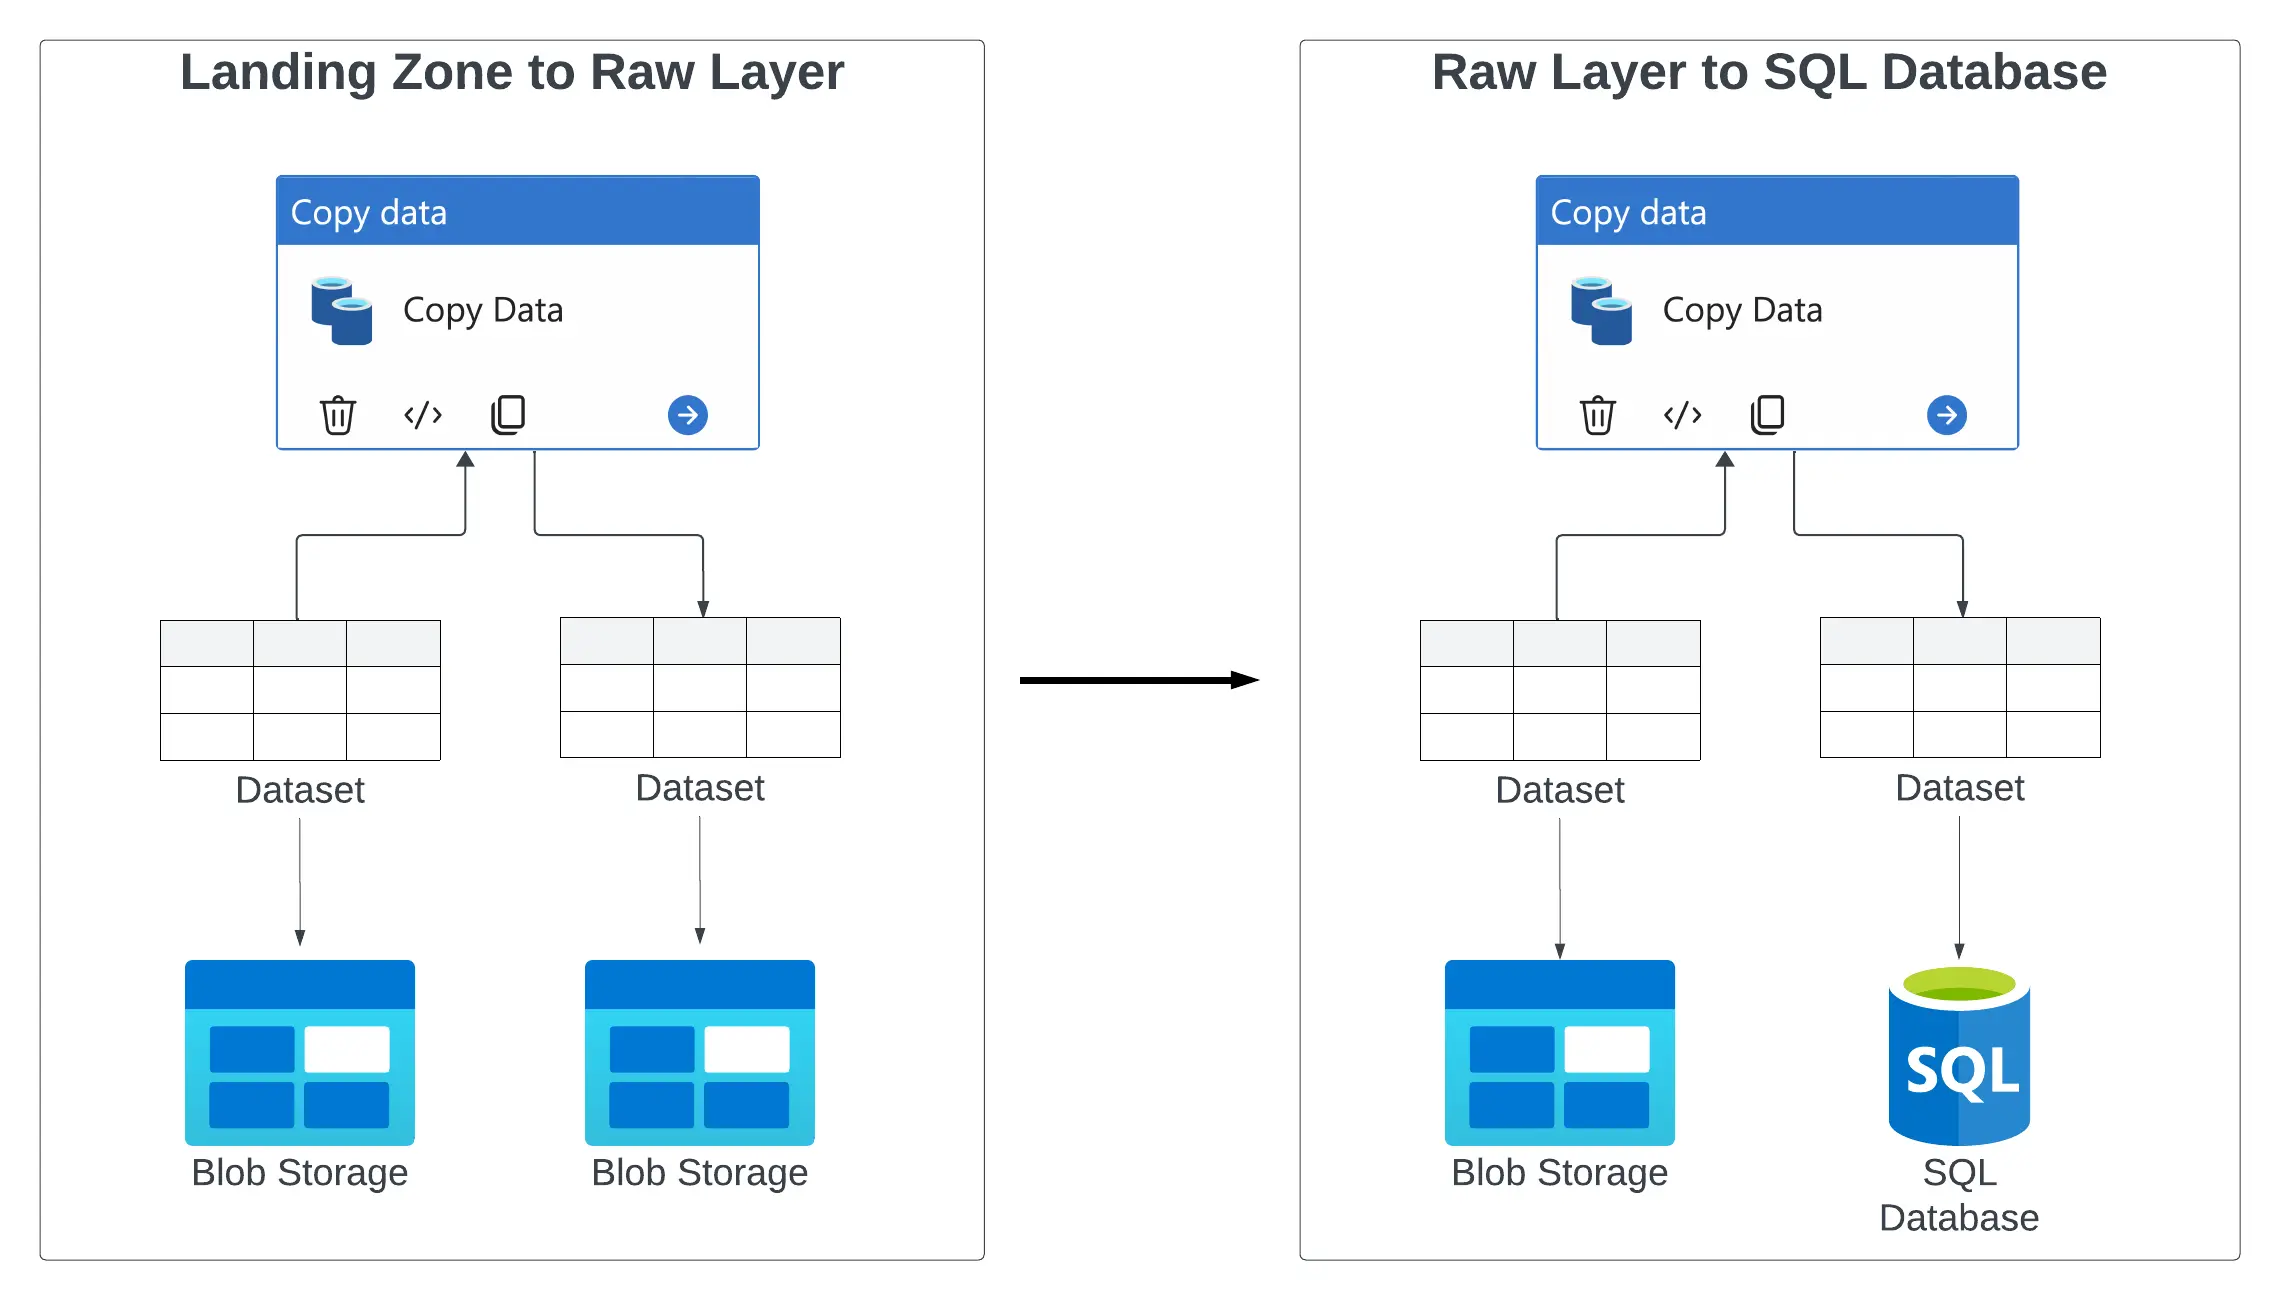
Imagine a scenario where a third party temporarily stores CSV files in a Landing Zone, represented by a Blob Storage. We want to copy this data over to a Raw Layer (our own storage account), and then load it into a SQL Database. For an overview, see the diagram below. We’ll discuss all elements in this diagram. For the sake of brevity, I already created a Blob Storage with the two containers landing-zone and raw-layer, and a SQL server with a SQL database containing a single table dbo.persons. We’ll go over what these mean in the next few sections.
Pipeline
It should come as no surprise that the most fundamental element in ADF is a pipeline. A pipeline is a series of connected tasks (called Activities - see next section) that automate the movement and transformation of data from one or multiple sources to a target destination.
In our case, we will just create a single pipeline, consisting of just a few Activities. I’ll refer to this overview diagram throughout this post, explaining its elements.
 An overview of the example pipeline.
Activities
An Activity is a stand-alone task within a pipeline. Various types of activities exist, such as for data ingestion, transformation, and loading. For data ingestion, activities like Copy Data allow extracting data from various Sources, such as databases, files, or streaming services and store these into targets (called Sinks). Many different Sources and Sinks can be used out of the box (see this full list). Transformation activities like Data Flow enable users to perform data cleansing, transformation, and enrichment tasks using the GUI or code.
Our example pipeline will consist of two Copy Data activities (top row in the overview diagram), where each activity will copy data from a Source into a Sink. 1) Copy the CSV file from the Landing Zone into the Raw Layer in our own Storage account. 2) Load the CSV file into a SQL database.
 The two Activities in our pipeline.
Linked Services
The two Activities described above need to connect to various services within Azure. However, we do need to specify how to connect to these services, and ideally in a way that we can reuse these within other pipelines as well. Linked Services provide a solution to this, serving as the bridge between the pipeline and external data sources or destinations. They contain connection information and (references to) credentials required to access these resources. For instance, a Linked Service for the SQL Database would include authentication details and server information. Similarly, a Linked Service for the Blob Storage would contain the necessary credentials and endpoint information.
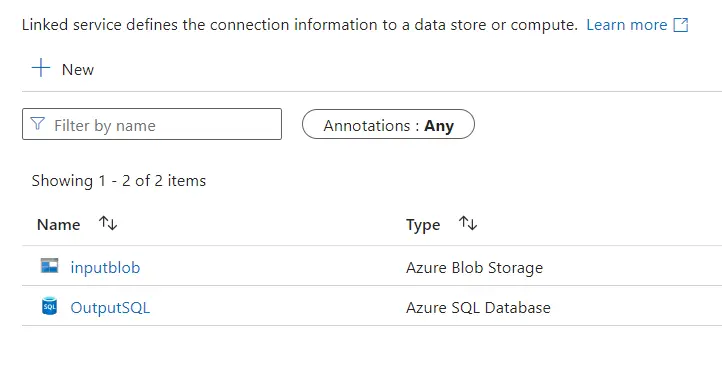
For our pipeline, we’ll define two Linked Services (bottom row in overview diagram). 1) The Blob Storage used for both the Landing Zone and the Raw Layer. Note that in a real-life scenario these would probably be stored in two separate Storage Accounts. 2) The SQL Database.
 The two Linked Services defined in Azure.
Datasets
The above two Activities and their three associated Linked Services define what to do using which services. What the format of the data will be, however, is still unknown. A Dataset serves as structured representations of data within the pipeline, containing the metadata necessary for data processing. For instance, a dataset could represent files stored in Blob Storage, specifying attributes such as location and file format (e.g., a standard CSV file with certain columns). Similarly, Datasets can also represent a table in a SQL Database, defining its schema and connectivity details.
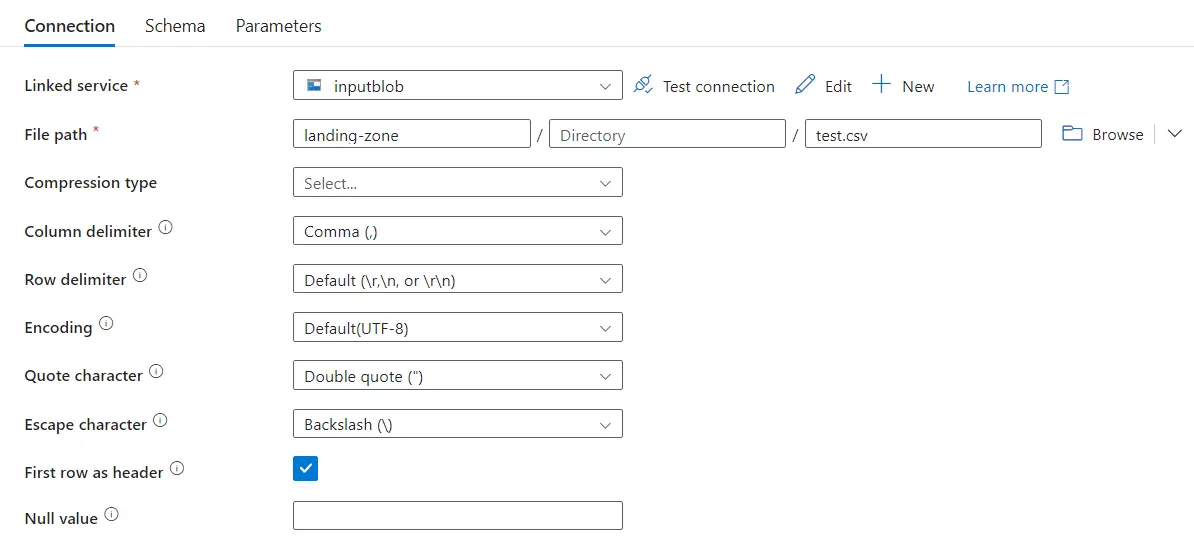
We’ll define three Datasets (middle row in overview diagram). 1) The file location and format of our CSV file in the Landing Zone (see image below). 2) A similar Dataset for the CSV file in the Landing Zone. 3) A schema for our target table in the SQL database.
 An overview of a Dataset definition.
Integration Runtime
Now that all elements are in place, the only thing we need is an environment in which to run each activity in our pipeline. An Integration Runtime (IR) provides exactly this. It is the backbone infrastructure that facilitates data movement and transformation across diverse environments.
Two types of exist:
- Azure Integration Runtime (AIR): a fully managed runtime for running activities Azure services.
- Self-Hosted Integration Runtime (SHIR): a user-managed IR within the user’s network. A SHIR allows ADF to access resources located on-premises or in virtual networks. A SHIR is particularly useful in hybrid cloud scenarios where data resides both on-premises and in the cloud.
Since all of the current services are simple Azure services located within our own network, we’ll opt to use the default Azure Integration Runtime.
Triggers
Now that everything is in place, we need a way to start our pipeline. Triggers in ADF initiate pipelines based on predefined schedules or event-driven conditions. For example, you can set up a trigger to run a pipeline daily at a specific time, or after another pipeline has successfully finished execution. This enhances efficiency and reliability of your data pipelines within ADF.
Since our example involves just a single CSV file, we don’t set a trigger. However, suppose a single file would be dumped daily, then an event-based trigger would probably suffice. Any new data coming into the Landing Zone would trigger our pipeline.
To Conclude
There you have it. Understanding these key concepts of pipelines, activities, datasets, linked services, integration runtimes, and triggers are crucial for building data pipelines in ADF. The example used, while obviously very simplistic, does illustrate how these concepts relate to each other. The official documentation for ADF is quite good and helped me a lot in making this, so feel free to check it out. Now go out there and try it yourself!